
Affiliate Disclosure
This article may contain affiliate links. If you purchase through these links, we may earn a small commission at no additional cost to you. As an Amazon Associate, we earn from qualifying purchases.
Jewelry can lose its sparkle surprisingly quickly as oils, lotion, soap, and everyday dirt settle around settings and clasps. A homemade jewelry cleaner recipe may seem like an easy solution, but using the wrong ingredient can scratch metal, weaken plating, or damage a delicate gemstone.
In this guide, you will learn how to choose a homemade jewelry cleaning recipe based on what your jewelry is made from. We will cover a gentle everyday method, a safer approach for tarnished silver, and a homemade gold jewelry cleaner recipe, along with the ingredients you should avoid. Finding the best homemade jewelry cleaner recipe is not about using the strongest mixture. It is about matching the method to the metal, stone, and setting.
To keep the advice trustworthy, I compared established jewelry care guidance, tested each recipe at home on suitable pieces from my own jewelry collection, and reviewed how common household ingredients affect different materials. I will begin with the gentlest recipe, which is the safest starting point for many everyday pieces.
What Is the Safest Homemade Jewelry Cleaner Recipe?
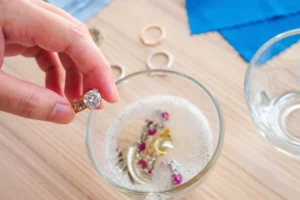
The safest homemade jewelry cleaner recipe for many sturdy pieces is warm water mixed with a few drops of mild dish soap. Clean the jewelry gently with a new soft brush, rinse it in a separate bowl of clean water, and dry it completely. Pearls, opals, turquoise, plated jewelry, and glued settings require more delicate care.
Explore more of my tested homemade cleaning recipes for other areas of your home.
Check Your Jewelry Type Before Cleaning
No homemade jewelry cleaning recipe is suitable for every piece. Identify the metal, gemstone, plating, and setting before choosing a method.
| Jewelry type | Safest starting method | What to avoid |
|---|---|---|
| Solid gold | Warm water, mild dish soap, and a very soft brush | Bleach, chlorine, toothpaste, abrasive powders, and stiff brushes |
| Gold plated jewelry | Wipe gently with a soft cloth lightly dampened with mild soapy water, then dry immediately | Soaking, vigorous scrubbing, vinegar, baking soda, and abrasive polish |
| Sterling silver | Use mild soapy water for everyday dirt and a silver polishing cloth for tarnish | Abrasive scrubbing, concentrated acids, bleach, and unsuitable tarnish treatments |
| Diamond jewelry | Warm water, mild dish soap, and a soft brush after checking that the stone is secure | Chlorine, harsh chemicals, aggressive brushing, and cleaning loose settings |
| Pearls | Wipe carefully with a soft damp cloth or clean gently with a new soft brush and mild soapy water | Soaking, vinegar, baking soda, ultrasonic cleaners, and abrasive cloths |
| Opals | Warm soapy water and a soft cloth | Heat, sudden temperature changes, acids, harsh chemicals, and ultrasonic cleaning |
| Emeralds | Lukewarm water, mild dish soap, and a soft brush used carefully | Steam, ultrasonic cleaners, harsh chemicals, and prolonged soaking |
| Turquoise | Wipe gently with a slightly damp soft cloth and dry immediately | Soaking, vinegar, chemicals, oils, ultrasonic cleaners, and abrasive products |
| Costume jewelry | Wipe with a soft cloth lightly dampened with mild soapy water | Soaking, acids, alcohol, abrasives, and excessive moisture |
| Jewelry with glued stones | Wipe the surface carefully with a slightly damp cloth | Soaking, heat, steam, vinegar, and any method that can weaken the adhesive |
⚠ Warning
When the jewelry material, treatment, or setting is unknown, use only a soft, dry cloth and ask a professional jeweler before applying a cleaning solution. Valuable heirlooms, loose stones, damaged settings, and antique jewelry should be professionally inspected.
This guidance follows the GIA recommendations for caring for jewelry and the Jewelers Mutual warnings about homemade jewelry cleaners.
Recipe 1: Gentle Homemade Jewelry Cleaner Recipe for Everyday Jewelry
This gentle homemade jewelry cleaner recipe is a suitable starting point for many sturdy pieces made from solid gold or platinum and for securely set diamonds, rubies, and sapphires.
Check the care instructions for treated gemstones before cleaning.
Ingredients
- 1 cup of warm water
- 2 to 3 drops of mild dish soap without bleach, moisturizers, or abrasive additives
Tools
- Two small bowls
- A new, very soft brush
- A clean, soft, lint-free cloth
Instructions
- Check the jewelry under bright light. Do not clean it at home if a stone moves, a prong looks bent, or the setting appears damaged.
- Combine the warm water and dish soap in the first bowl. The water should feel comfortably warm, not hot.
- Place suitable jewelry in the solution for 5 to 10 minutes. This gives the soapy water time to loosen lotion, skin oils, and residue around the setting.
- Hold the piece over the bowl and brush it gently. Pay particular attention to the underside of stones and the areas around clasps, but do not force the brush beneath delicate prongs.
- Rinse the jewelry in a second bowl of clean, lukewarm water. Using a bowl is safer than rinsing directly over an open drain.
- Pat the piece dry with a clean, soft cloth. Leave it in a secure place until every setting and crevice is completely dry.
What I Noticed During My Home Test
When I tested this method at home on suitable everyday jewelry, I noticed:
- Visible film loosened easily: The warm soapy water removed the film around the settings without requiring hard scrubbing.
- Cleaning underneath made the biggest difference: Oil and residue had collected beneath the stones, so gently cleaning these areas noticeably improved their appearance.
- A small amount of soap worked best: Using only a few drops made the jewelry easier to rinse.
- More soap did not improve cleaning: Adding extra dish soap only created more residue that needed to be rinsed away.
Best For
Solid gold, platinum, and securely set diamonds, rubies, and sapphires that have been approved for gentle washing.
Do Not Use It On
Pearls, opals, turquoise, coral, amber, gold-plated jewelry, costume jewelry, glued stones, loose settings, antique pieces, or gemstones with unknown treatments.
💡 Tip
Safety note: If you are uncertain about a gemstone or treatment, skip the soak and ask a jeweler how the piece should be cleaned.
👨🔬 Expert Tip
Use a new, very soft brush only on sturdy jewelry approved for gentle brushing. For pearls, plated jewelry, glued settings, and delicate gemstones, use the cleaning method recommended for that specific material.
Recipe 2: Homemade Jewelry Cleaning Recipe for Sterling Silver
This homemade jewelry cleaning recipe removes everyday oils and surface dirt from suitable sterling silver. Mild soap cleans the grime, while a proper silver polishing cloth can address light tarnish more safely than abrasive kitchen ingredients.
Ingredients
- 1 cup of lukewarm water
- 2 drops of mild dish soap
Tools
- Two small bowls
- A clean, soft cloth
- A silver polishing cloth intended for jewelry
Recommended Jewelry Drying Cloth
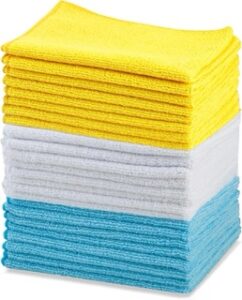
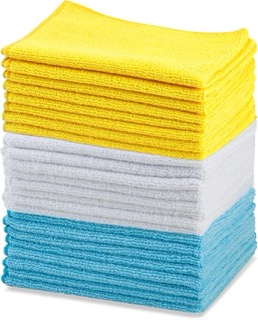
Amazon Basics Microfiber Cleaning Cloths
A clean microfiber cloth can help absorb moisture after rinsing suitable jewelry. Keep one unused cloth exclusively for this purpose so it does not transfer cleaning chemicals, grit, or household dirt onto the jewelry.
Why it may be useful:
✔ Soft and absorbent
✔ Reusable and washable
✔ Helps remove remaining water from sturdy pieces
✔ Useful for many other household cleaning tasks
Use it carefully: Pat jewelry dry instead of rubbing aggressively. Do not use a general household cloth on pearls, delicate gemstones, damaged plating, loose settings, or valuable antique pieces.
Read More: See my complete Amazon Basics Microfiber Cleaning Cloths review before deciding whether they are suitable for your cleaning routine.
Instructions
- Confirm that the piece is sterling silver rather than silver-plated. Check it for glued stones, delicate gemstones, intentional dark detailing, or loose settings.
- Mix the lukewarm water with two drops of mild dish soap.
- Place plain, suitable sterling silver in the solution for 2 to 5 minutes.
- Wipe the surface gently with a soft cloth. Use a very soft brush only when the design contains small crevices that the cloth cannot reach.
- Rinse the piece in a separate bowl of clean, lukewarm water.
- Dry it immediately and completely with a soft cloth.
- If light tarnish remains, use a silver polishing cloth according to its directions. Rub gently and stop if the finish begins to change unexpectedly.
What I Noticed During My Home Test
During my home test, the results showed an important difference between cleaning silver and removing tarnish:
- The soap removed everyday grime: It helped lift skin oils, fingerprints, and ordinary surface residue.
- Established tarnish remained visible: The mild soap solution alone did not completely restore heavily tarnished areas.
- The polishing cloth made the greater difference: Once the jewelry had been washed and dried, gentle polishing produced the most noticeable improvement.
- Each step served a different purpose: Soap cleaned the surface, while the silver polishing cloth helped address light tarnish.
- Heavy tarnish needs greater care: A suitable silver cleaning product or professional cleaning may be necessary when discoloration is extensive.
Best For
Plain sterling silver jewelry with secure settings and no delicate or porous stones.
Do Not Use It On
Silver-plated jewelry, oxidized silver with intentional dark details, glued settings, pearls, opals, turquoise, coral, antique pieces, or jewelry with an unknown finish.
⚠ Warning
Important: Do not scrub silver with toothpaste or dry baking soda. Their abrasive particles may leave fine scratches. For heavy tarnish or valuable pieces, use a jeweler-recommended product or request professional cleaning.
Although vinegar is useful for numerous household jobs, jewelry requires greater caution. Read our guide to white vinegar for cleaning before deciding where vinegar is and is not appropriate.
Recipe 3: Homemade Gold Jewelry Cleaner Recipe
This homemade gold jewelry cleaner recipe uses diluted dish soap rather than vinegar, baking soda, toothpaste, or hydrogen peroxide. The correct method depends on whether the jewelry is solid gold or gold-plated.
Ingredients
- 1 cup of warm water
- 2 drops of mild dish soap
Tools
- Two small bowls
- A new, very soft brush suitable for solid gold
- A clean, soft, lint-free cloth
Instructions for Solid Gold
- Inspect the piece for loose stones, damaged prongs, and weakened clasps.
- Mix the warm water and mild dish soap in a bowl.
- Soak suitable solid gold jewelry for 5 to 10 minutes.
- Brush it very gently, concentrating on recessed areas where lotion and oil accumulate.
- Rinse the jewelry in a separate bowl of clean, lukewarm water.
- Pat it dry and allow hidden areas around the setting to dry completely.
Instructions for Gold Plated Jewelry
- Do not soak gold-plated jewelry.
- Dip the corner of a soft cloth into the diluted soap solution and squeeze out the excess moisture.
- Wipe the surface lightly without scrubbing.
- Wipe it again with another cloth lightly dampened with clean water.
- Dry the piece immediately with a clean, soft cloth.
What I Noticed During My Home Test
When I tested these methods at home, I treated solid gold and gold-plated jewelry differently:
- Recessed areas showed the greatest improvement: Removing the dull film around clasps, settings, and detailed areas made a more noticeable difference than polishing the visible surface.
- A short soak was enough for solid gold: Warm soapy water and gentle brushing removed ordinary residue without aggressive scrubbing.
- More pressure was unnecessary: Light brushing worked better than trying to polish the gold forcefully.
- Gold-plated jewelry needed less moisture: I used a lightly dampened cloth instead of soaking the piece.
- Gentle wiping offered better control: This reduced unnecessary rubbing and moisture exposure that could contribute to wear on the thin gold layer.
Best For
Solid gold jewelry and, with the separate no-soak technique, lightly soiled gold-plated pieces.
Do Not Use It On
Loose settings, glued stones, pearls, opals, turquoise, coral, damaged plating, antique jewelry, or gemstones with unidentified treatments.
⚠ Warning
Important: Gold is relatively soft. Avoid toothpaste, abrasive powder, stiff brushes, bleach, chlorine, and aggressive polishing.
How to Store Homemade Jewelry Cleaner Safely
For the safest results, prepare only enough homemade jewelry cleaner recipe for one cleaning session. A diluted soap solution is quick to make, and storing it can allow dust, residue, or contamination to collect inside the container.
Peroxide and vinegar are not recommended as general jewelry cleaners because they may damage certain metals, finishes, gemstones, or adhesives.
Storage Tips
- Mix only what you need: Prepare a fresh soap solution for each cleaning session.
- Discard it after cleaning: Do not return used solution to a storage container because it may contain dirt and residue removed from the jewelry.
- Keep the original products separate: Store dish soap, vinegar, and hydrogen peroxide in their original labeled containers.
- Avoid mystery mixtures: Never keep an unlabeled homemade cleaner or combine leftover cleaning solutions.
- Do not use a spray bottle: Spraying can send cleaner into settings, seams, and glued areas where moisture may become trapped.
By preparing your homemade jewelry cleaner recipe fresh each time, you know exactly what is in the bowl and avoid applying an old or contaminated mixture to valuable jewelry.
👨🔬 Expert Tip
Label any household mixture you temporarily prepare with its contents and preparation date. If you cannot identify a mixture confidently, discard it safely rather than testing it on jewelry.
Jewelry Cleaning Myths: What I Tested and What Experts Warn Against
Over the years, I have found many jewelry cleaning hacks on forums and social media. Some may appear to work at first, but the immediate shine does not reveal whether the method has scratched a surface, weakened a finish, or affected a gemstone.
Common Jewelry Cleaning Myths
- Toothpaste is a safe polish: Toothpaste can be abrasive enough to leave fine scratches on metals and delicate surfaces.
- Cola is a gentle jewelry cleaner: Cola contains acids and other ingredients that are unnecessary for routine jewelry cleaning and may leave a sticky residue.
- Bleach makes jewelry brighter: Bleach and chlorine can damage metals, weaken alloys, and affect certain gemstones and settings.
- Ammonia is suitable for every gemstone: Ammonia may be unsuitable for porous, treated, delicate, or fracture-filled gemstones.
- Baking soda is safe because it is natural: Dry baking soda and baking soda pastes can act as abrasives and scratch softer metals or plated finishes. Hydrogen peroxide and baking soda also require careful handling, as explained in my guide to mixing hydrogen peroxide and baking soda for cleaning.
I personally tested toothpaste on an old silver ring. Although it removed some tarnish, it also left fine scratches that made the surface look duller. The experiment showed me that visible cleaning power does not necessarily make an ingredient safe.
That is why I recommend choosing a tested homemade jewelry cleaning recipe based on the metal, gemstone, setting, and finish instead of following a universal cleaning hack.
💡 Tip
Skip toothpaste, cola, bleach, and aggressive kitchen mixtures. A small amount of mild dish soap in warm water is a safer starting point for many sturdy pieces, but delicate or unidentified jewelry should be assessed by a professional jeweler.
How to Maintain Your Jewelry Shine & Prevent Tarnish Long-Term
Cleaning is important, but prevention is even better. A few simple habits can keep your jewelry sparkling for longer.
Storage Hacks
- For sterling silver: Consider using anti-tarnish strips inside the storage compartment, following the product directions.
- Store pieces in soft pouches or microfiber cloth bags.
Routine Cleaning Schedule
- Frequently worn jewelry: Wipe it after wearing and clean it gently when visible residue or dullness develops. For many suitable pieces, this may be every few weeks.
Occasionally worn jewelry: Inspect and clean it only when needed before returning it to storage.
Avoiding Exposure
Perfume, lotions, and even water can speed up tarnish. Put on jewelry last when getting ready and remove it before swimming or exercising.
💡 Tip
Gently wiping suitable jewelry with a clean, soft cloth after wearing it helps remove skin oils, lotion, and moisture before they build up.
Pro Tips for Cleaning Jewelry at Home
After testing these methods at home, I found that a few small habits make jewelry cleaning safer and more effective:
- Inspect first: Do not clean jewelry with loose stones, bent prongs, or damaged settings.
- Use lukewarm water: Hot water may damage temperature-sensitive stones or adhesives.
- Start gently: A few drops of mild dish soap are usually enough. More soap and harder scrubbing will not improve the result.
- Avoid soaking delicate pieces: Pearls, opals, turquoise, plated jewelry, and glued settings need special care.
- Rinse over a bowl: This keeps small pieces away from an open drain.
- Dry completely: Remove moisture from clasps, settings, and hidden areas before storage.
These homemade jewelry cleaning tips can prevent common mistakes. If you do not know what a piece is made from, ask a jeweler before cleaning it.
Final Verdict
A good homemade jewelry cleaner recipe does not need harsh ingredients or expensive products. From my testing, lukewarm water, a few drops of mild dish soap, and a gentle cleaning technique worked well for removing everyday oils and dirt from suitable pieces.
The most important step is matching the method to your jewelry. Solid gold, sterling silver, plated pieces, and delicate gemstones cannot always be cleaned in the same way. When you are unsure about a stone, treatment, or setting, keep it dry and ask a professional jeweler.
Start with the gentlest suitable method, avoid aggressive cleaning hacks, and your favorite pieces can regain their shine without unnecessary risk.
FAQs About Homemade Jewelry Cleaner Recipes
What Is the Best Homemade Jewelry Cleaner Recipe for Silver?
From my experience, lukewarm water with two drops of mild dish soap works best for removing oils and everyday dirt from suitable sterling silver. For remaining tarnish, I use a silver polishing cloth. I avoid baking soda and vinegar because they can be too aggressive for plated silver, delicate finishes, and gemstone settings.
Can I Use a Homemade Jewelry Cleaning Recipe With Baking Soda and Vinegar?
I do not recommend this mixture as a general jewelry cleaner. Baking soda can scratch softer metals and plated finishes, while vinegar may damage porous gemstones and certain settings. Mild dish soap and lukewarm water are a safer starting point for many sturdy pieces.
Is a Homemade Jewelry Cleaner Recipe Safe for Diamonds and Gemstones?
It depends on the stone and setting. I use mild soapy water only on secure diamonds and other sturdy gemstones approved for gentle washing. Pearls, opals, turquoise, emeralds, treated stones, and glued settings need more careful cleaning. If I cannot identify the stone or treatment, I use a soft, dry cloth and ask a jeweler.
How Often Should I Use a Homemade Gold Jewelry Cleaner Recipe?
I clean frequently worn solid gold when it begins to look dull, usually every few weeks rather than on a strict schedule. Between cleanings, I wipe it with a soft cloth. Gold plated jewelry should be cleaned less often and should not be soaked or scrubbed.
What Household Items Can I Use to Clean Jewelry Safely?
For suitable jewelry, I use lukewarm water, a few drops of mild dish soap, a new very soft brush, and a clean lint free cloth. I do not use toothpaste, bleach, baking soda, vinegar, or hydrogen peroxide as universal jewelry cleaners because the wrong ingredient can damage the metal, stone, plating, or adhesive.











O-Cedar EasyWring RinseClean Spin Mop System Review: Worth Buying?
Does separate clean water make mopping easier? Explore the O-Cedar Eas…
O-Cedar EasyWring Spin Mop Review: Is It Worth Buying?
Does easier wringing make the O-Cedar EasyWring spin mop worth buying?…
Roborock Saros 10R Robot Vacuum Review: Is It Worth the Premium Price?
Is the Roborock Saros 10R worth its premium price? This in-depth revie…

Roborock Qrevo S Pro Robot Vacuum Review: Is It Worth Buying?
The Roborock Qrevo S Pro promises less daily vacuuming and mop care. T…

10 Best Roborock Robot Vacuum Models: Which Fits Your Home?
Which Roborock robot vacuum fits your home? Compare 10 models across t…
5 Best Microfiber Cleaning Cloths: Which Should You Buy?
Find the best microfiber cleaning cloth for your home. Compare five pi…
USANOOKS Microfiber Cleaning Cloth Review: Is the Grey 12 Pack Worth It?
Considering the USANOOKS grey 12 pack? Explore its size, color choices…

MR.SIGA Microfiber Cleaning Cloth Review: Is the 12 Pack Worth It?
Are MR.SIGA microfiber cleaning cloths worth a spot in your kitchen? T…
Amazon Basics Microfiber Cleaning Cloths Review: Are They Worth Buying?
Amazon Basics Microfiber Cleaning Cloths provide an affordable 24 pack…
Roborock Q7 M5+ Robot Vacuum Review: Is This Budget Vacuum and Mop Worth It?
Can an affordable robot really vacuum, mop and empty itself effectivel…
Eufy E25 Robot Vacuum and Mop Review: Is It Worth Buying?
Can the Eufy E25 Robot Vacuum replace both your vacuum and mop? This i…
Scrub Daddy Review: Is This Popular Sponge Worth It?
Is Scrub Daddy really better than a regular sponge? This Scrub Daddy r…