

This article may contain affiliate links. If you purchase through these links, we may earn a small commission at no additional cost to you. As an Amazon Associate, we earn from qualifying purchases.
When the bacon’s sizzling and the fan’s humming but the air still feels heavy, your microwave’s vent isn’t the heriot’s the problem. A gunched-up filter can’t pull its weight, so odors linger and grease collects.
The fix is straightforward: once you know how to clean microwave vent filters, you’ll get stronger airflow, fewer smells, and a safer kitchen.
Below, I walk you through what to check, the step-by-step that actually works, and a few pro moves for filters that look like they’ve been through years of weekend fry-ups.
To clean a microwave vent, remove the grease filter from the bottom of the microwave, soak it in hot soapy water, scrub with a sponge or brush, rinse, and let it dry completely before reinstalling. Wipe the vent area with soapy water to remove leftover grease.
What is a Microwave Vent and Why Clean It?
Your over-the-range microwave doesn’t just heat food—it also works as a mini ventilation system. The vent pulls in steam, smoke, and grease from your stovetop and runs it through filters. It’s typically a thin metal mesh, often referred to as the grease filter. Some models also include a charcoal filter, which absorbs odors before the air is recirculated back into your kitchen.
You can always tell when the vent filter is dirty; it practically gives itself away. Airflow becomes weak, food smells linger, and you might see sticky residue around the bottom of the microwave.
From what I’ve seen, once the filter is coated in grease, the fan might run loud but it barely pulls any air at all. Cleaning restores the suction, keeps your microwave from working overtime, and helps prevent grease fires—yes, that really can happen if buildup gets extreme. Regular cleaning and maintenance of this area is a very important first step in microwave odor removal, as the layer of old oil that builds up will continue to spread a stale cooking odor throughout the room every time the appliance heats up.
Read More: How to Clean a Stainless Steel Microwave
Types of Microwave Vent Filters
Not all microwave vent filters are created equal. Here are the two main types you’ll run into:
1. Grease filters (Reusable): Usually made of aluminum mesh, designed to trap oil and grease particles. These are washable and reusable. Sizes vary, but they typically run 5–7 inches wide and snap right into the bottom of your microwave.
If your microwave vent filter is bent, heavily clogged, or won’t come clean, replacing it with a compatible GE microwave vent grease filter is often the best solution.
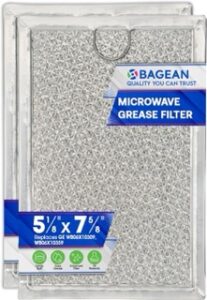
Microwave Grease Filter Replacement (2-Pack) for GE, LG & Kenmore
Replacing a clogged or worn-out GE microwave vent grease filter to restore proper airflow and grease filtration.
Pros
✔ Easy to install in minutes.
✔ Traps grease to improve ventilation.
✔ Helps reduce cooking odors.
✔ Durable aluminum mesh construction.
Cons
✘ Compatible with selected GE models only.
✘ Doesn't replace charcoal filters.
Why We Recommend It
If your vent filter is damaged or no longer cleaning properly, this replacement filter is an easy way to improve airflow and keep grease from building up inside your microwave.
2. Charcoal filters (Replaceable): These are the odor-absorbing type. You can’t wash these once they’re full; the only option is to swap them out for a new one. You’ll mostly find them in recirculating microwaves that don’t vent outside.
Most homes have at least a grease filter. Some have both, depending on the microwave brand and venting setup.
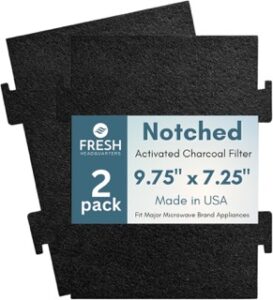
Microwave Charcoal Filter Replacement (2-Pack)
Replacing old charcoal filters to reduce cooking odors.
Pros
✔ Helps absorb odors
✔ Easy to cut and fit
✔ Universal design
✔ Good value
Cons
✘ Requires trimming
✘ Not a grease filter
Why We Recommend It
Replace your old charcoal filter to help reduce cooking odors and keep your microwave vent working efficiently.
Materials Needed
Make sure you have these supplies on hand before you begin:
- Dish soap (plain blue Dawn works wonders on grease)
- Warm water
- A non-abrasive scrub brush or sponge
- Baking soda (for stubborn buildup)
- Vinegar (optional, helps cut odor and grease)
- A small bucket or sink for soaking
- Paper towels or a microfiber cloth
Optional: a degreaser spray if you’re dealing with years of sticky residue.
Step-by-Step Guide: How to Clean a Microwave Vent
Step 1: Remove the filter
On most microwaves, removing the grease filter is simple—it typically slips or snaps out from the underside. Check your manual if it feels stuck, you don’t want to bend the mesh.
Step 2: Soak in hot soapy water
Fill your sink with steaming hot water, mix in a good squirt of dish soap, and make sure there’s enough to cover the filter fully. Drop the filter in and let it soak for at least 15 minutes.
Step 3: Scrub away grease
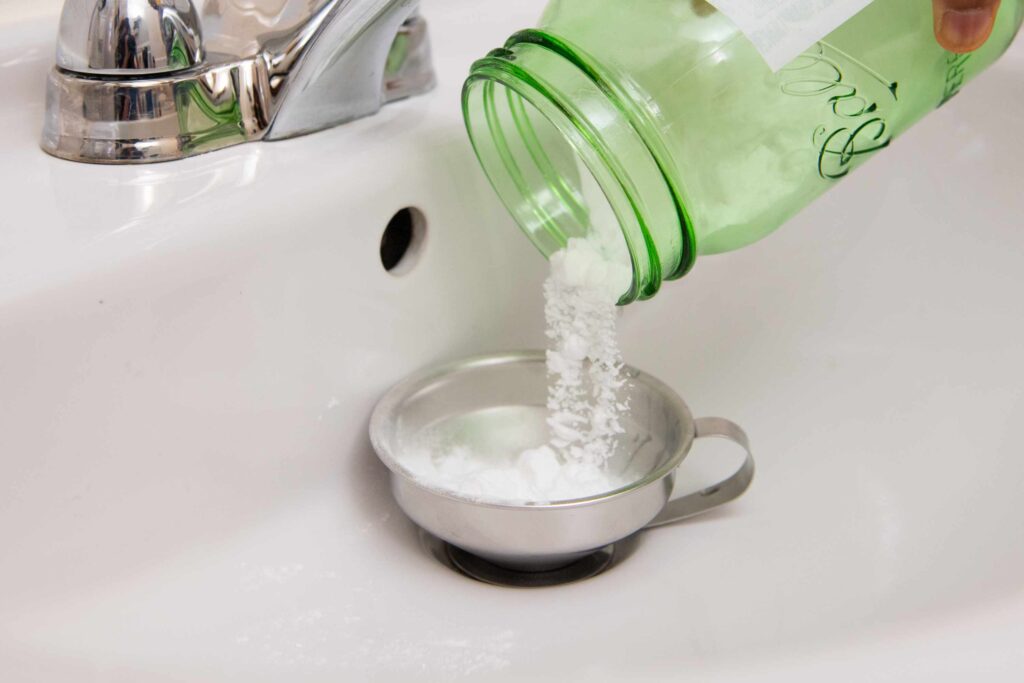
After soaking, use a soft brush or sponge to gently scrub away the loosened grease. For extra power, sprinkle some baking soda directly on the filter while scrubbing. Baking soda is slightly abrasive, so it breaks down that sticky film without damaging the mesh. This specialized microwave baking soda method is highly popular because it safely lifts the caramelized grease matrix without scratching the delicate aluminum strands underneath.
Tip: Pour a little vinegar into the soak water, its acidity cuts through tough grease and knocks out stubborn cooking smells
Step 4: Rinse and dry
Rinse the filter under warm running water until all soap is gone. Give it a good shake to remove extra water, then leave it out to air-dry fully before putting it back in place.
Step 5: Wipe the vent area
While the filter dries, take a soapy sponge and wipe down the vent area under the microwave. You’ll be surprised how much hidden grease collects there.
Step 6: Reinstall
After the filter has dried completely, just pop it back into place. That’s it—you’re done.
How to Deep Clean a Greasy and Stained Microwave Vent
Sometimes a quick soak won’t cut it—especially if you’ve got years of bacon grease layered onto that filter. I once cleaned a microwave vent for a relative that looked like it belonged in a fast-food joint. Here’s what worked:
- Boil method: Bring a big pot of water to a boil, add a squirt of dish soap, and carefully drop the filter in. The boiling water melts away grease faster than soaking in warm water.
- Degreaser backup: If it’s still sticky, spray with a kitchen-safe degreaser, let it sit for a few minutes, then scrub again.
- Repeat soak: Sometimes it takes two or three rounds of soaking and scrubbing before the filter is back to silver instead of brown.
Tip: If the filter is warped, has holes, or still smells burnt after cleaning, it’s time to replace it instead of scrubbing endlessly.
Read More: How to Steam Clean a Microwave (6 Easy Methods + Pro Tips)
How Often Should You Clean Your Microwave Vent?
The general rule: clean it every one to three months. But if you cook a lot of fried or oily foods, you may need to do it monthly. According to the U.S. Department of Energy, grease buildup reduces airflow efficiency in vent fans by up to 30% (source: energy.gov). That means your microwave is working harder and your kitchen is staying smellier.
What is GE Microwave Vent Filter?
GE is one of the most popular microwave brands in the U.S., and their over-the-range models usually come with a grease filter and sometimes a charcoal filter. The grease filter looks like a thin aluminum screen. The charcoal type is typically a flat, black rectangle that tucks in just behind the vent grille.
How to Clean a GE Microwave Filter
The cleaning process is the same as other brands: remove, soak, scrub, rinse, and dry. The only difference is that GE specifically recommends using warm water with mild detergent. And remember, if you have a charcoal filter, that one isn’t cleanable—you’ll need to replace it every 6–12 months.
Microwave Vent and Filter Maintenance Hack
Here’s something I started doing at home: after cleaning my filter, I spray it lightly with vinegar before drying. It doesn’t leave a smell once dry, but it seems to keep grease from clinging as quickly.
Another hack from a Reddit cleaning forum: toss your grease filter in the dishwasher on the top rack once a month. Just don’t use heated dry—it can warp the mesh.
Tip: If you cook daily, set a calendar reminder on your phone to clean your filter. Trust me, three minutes of scrubbing now saves you from a nightmare grease block later.
Where to Buy a Microwave Oven Vent Filter Replacement?
If cleaning just won’t cut it, replacing the filter is simple. You can buy them directly from the manufacturer (GE, Whirlpool, Samsung, etc.) or from retailers like Amazon, Home Depot, Lowe’s, and Walmart. Appliance parts stores also carry them if you need one fast.
Cost ranges:
- Grease filters: usually $10–$25
- Charcoal filters: $15–$40
Always check your microwave’s model number before ordering, or you’ll end up with a filter that doesn’t fit.
Safety Precautions
- Always unplug your microwave before removing filters or cleaning around the fan area.
- Always let the filter dry completely before putting it back in; any leftover moisture can end up harming the fan motor.
- Make sure the filter is fully dry before reinstalling; moisture can damage the fan motor.
FAQs About Cleaning Microwave Vent & Filters
Can I use vinegar to clean microwave vent filters?
Yes—vinegar is great for breaking down grease and removing odors. Mix it into the soaking water, or spritz it straight onto the filter
Can I put microwave vent filters in the dishwasher for easy cleaning?
You can, but only grease filters. Charcoal filters will be ruined. Place grease filters on the top rack and avoid heated dry.
How do I know when to replace a microwave vent filter instead of cleaning it?
If the mesh is damaged, permanently discolored, or still smells bad after cleaning, it’s time to replace.
Which is better for odor removal: replacing or cleaning the vent filter?
Cleaning helps, but charcoal filters lose effectiveness over time. For odor control, replacement is best.
Can I clean a charcoal microwave filter, or does it always need replacement?
Charcoal filters can’t be washed. Once they’re saturated, they must be replaced.
How often should you clean or replace your microwave charcoal filter?
Every 6–12 months, depending on how often you cook.
How to clean the microwave vent or exhaust fan area under/over the stove when it’s hard to reach?
Use a degreaser spray and a long-handled scrub brush or an old toothbrush taped to a wooden spoon. Work slowly and wipe often.
Read More: Homemade Dishwasher Detergent Recipe
Conclusion
Cleaning microwave vent filters doesn’t take much time, but it makes a big difference in how your kitchen smells and how well your vent fan works. A simple soak in hot soapy water, a little scrubbing, and a rinse is all it takes.
Do it regularly every month or two and you’ll avoid the nasty buildup that turns a five-minute job into a half-hour battle.
Now that your vent is clean, don’t stop there. Check out our guide on cleaning the microwave interior with lemon; it’s the fastest way to keep the inside sparkling fresh, too.